· Onestop 22
Mercedes W222 Maybach Conversion Guide
Planning a Maybach-style conversion for your Mercedes-Benz S-Class W222? Find out what to check before ordering, how to avoid common fitment problems and what to discuss with your workshop.
Planning a W222 Maybach-Style Conversion
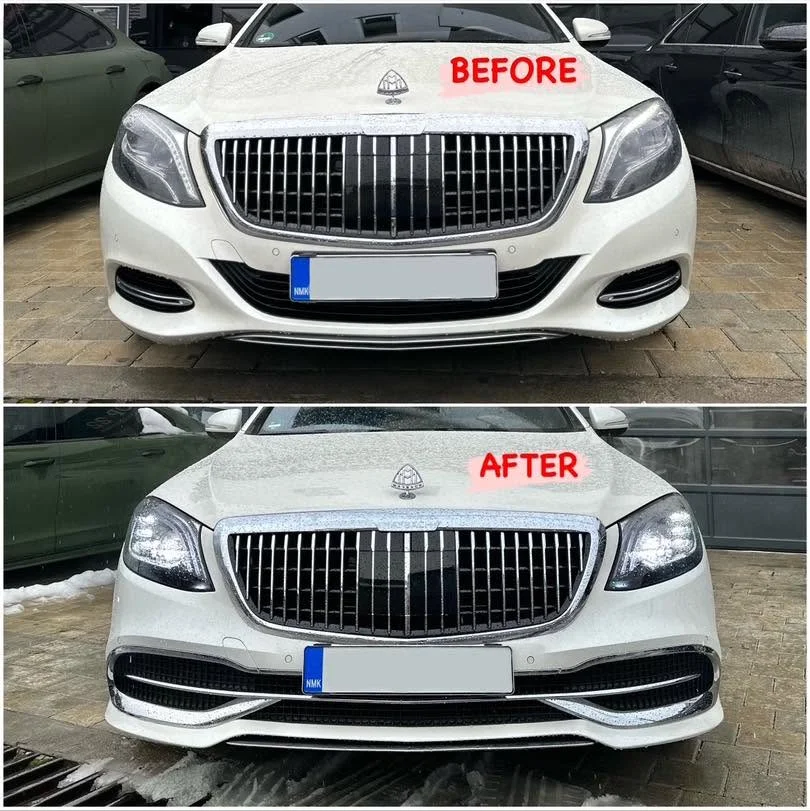
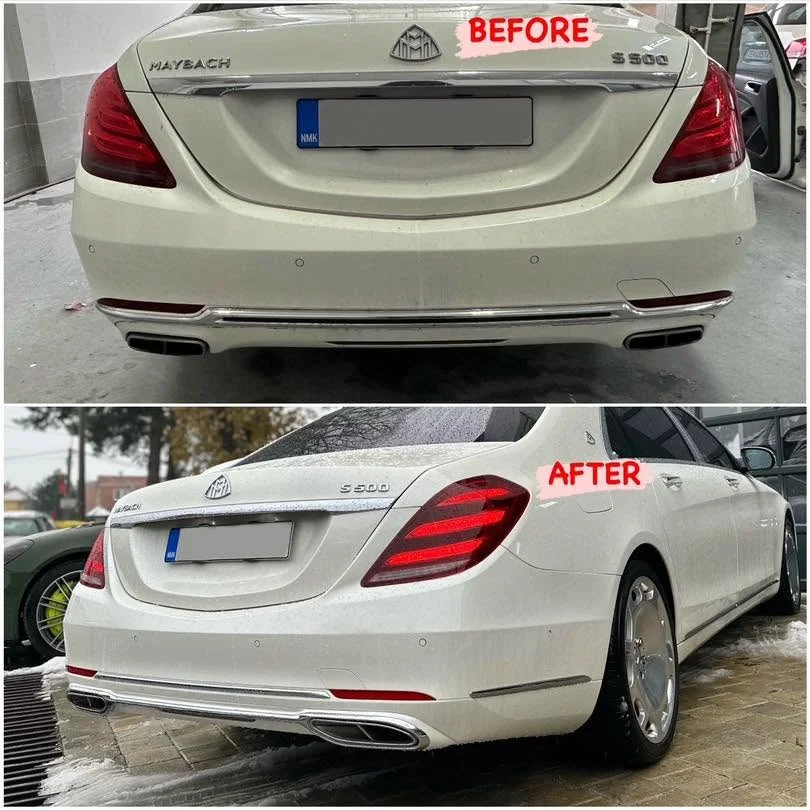
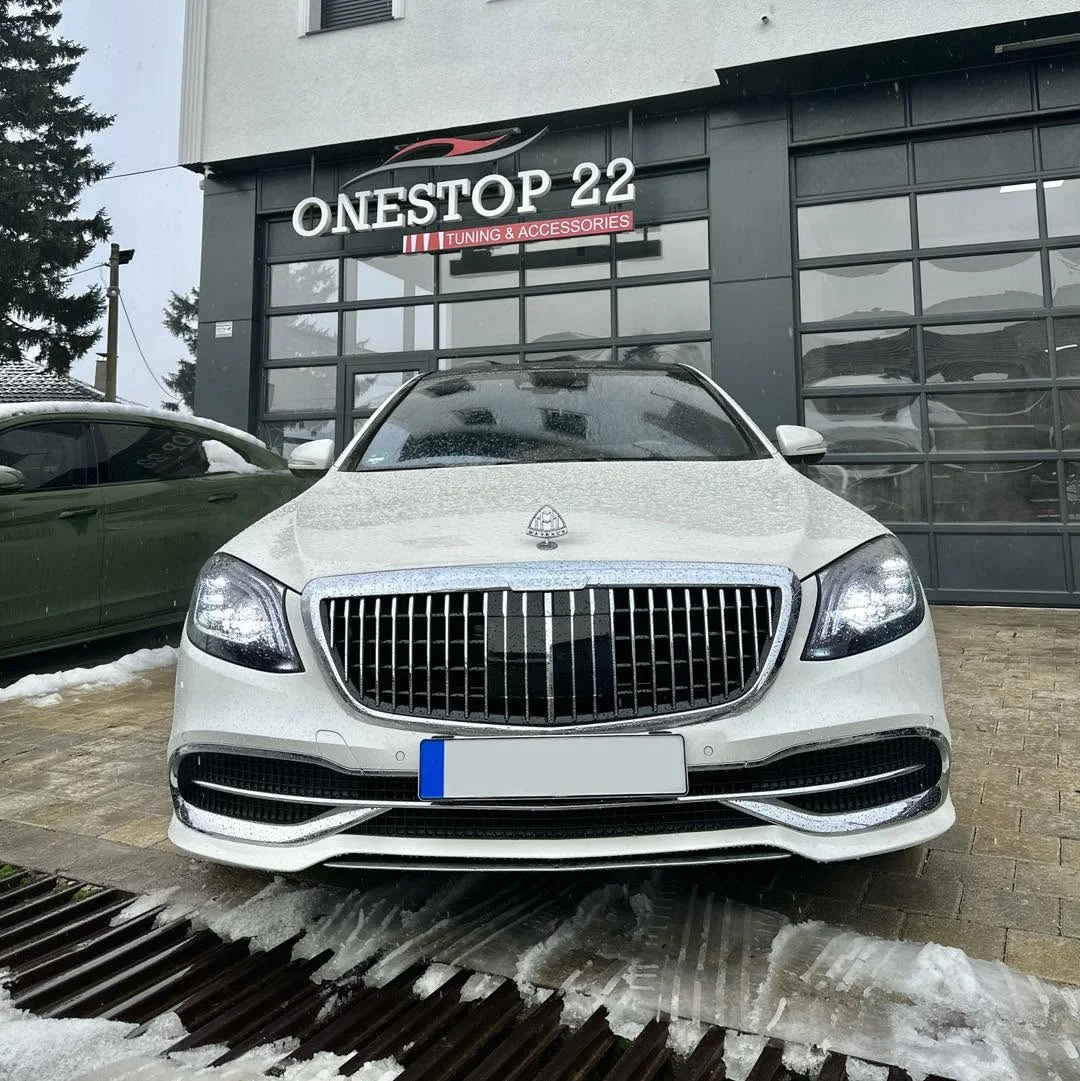
A Maybach-style conversion gives the Mercedes-Benz S-Class W222 a different exterior appearance. Depending on the package, it may include bumpers, a grille, lighting and additional trim. The exact components depend on the vehicle and the kit selected.
Before ordering, identify your vehicle's exact model and production details, along with its existing lighting and equipment. This helps establish which parts are suitable and whether additional components may be needed.
The conversion changes the vehicle's appearance. It does not automatically change its original identity, engine, drivetrain, wheelbase or factory specification. Describe the vehicle accurately when selling, insuring or registering it, and check local requirements for modified exterior parts and lighting.
For available package options, see our Mercedes W222 Maybach facelift conversion page.
What Should Your Conversion Kit Include?
Kit contents vary between suppliers. Before ordering, request a written parts list and confirm which components, brackets, trim pieces, adapters and lights are included in the price.
Front Bumper and Grille
Confirm the bumper version, grille, mounting points, lower trim and clearance for the equipment fitted to your car. Ask whether all required brackets and attachment pieces are supplied.
Headlights and Taillights
Identify the existing lamp versions and check connectors, supported functions, adapters and any required coding before ordering replacements.
Rear Bumper and Exhaust Trim
Check the bumper profile, reflectors, exhaust trim and mounting provisions against your vehicle's configuration.
Brackets and Fasteners
Confirm which clips, brackets, supports and fasteners are supplied. Missing hardware can delay installation and increase costs.
Sensors and Cameras
Check that the replacement parts accommodate your parking sensors, cameras and other fitted equipment. Matching openings alone do not guarantee correct operation.
Optional Extras
Ask whether additional trim, wiring, adapters or other components must be purchased separately.
Keep the agreed parts list with your order confirmation. Check the delivery against it before painting or installation begins, and report missing or damaged components to the supplier.
Check Your W222 Before Ordering
Mercedes-Benz S-Class W222 models differ in bodywork, lighting and factory equipment. Before ordering a Maybach-style conversion kit, identify your exact vehicle version and check it against the supplier's fitment information. The registration year alone is not sufficient to confirm compatibility.
| Current Setup | Planned Conversion | What to Check |
|---|---|---|
| Pre-facelift W222 | Front conversion | Bumper design, grille, headlight version, mounting points and brackets |
| Pre-facelift W222 | Rear conversion | Taillights, bumper profile, reflectors, exhaust trim and mounting points |
| Facelift W222 | Front conversion | Existing front-end components, kit-specific fitment, lighting and trim compatibility |
| Facelift W222 | Rear conversion | Rear lamp configuration, bumper attachment points, exhaust trim and sensor provisions |
| W222 with previously replaced body parts | Any conversion package | Installed components, previous modifications, mounting hardware and panel alignment |
| W222 with different lighting equipment | Replacement headlights or taillights | Exact lamp version, connectors, supported functions and any required adapters or coding |
| W222 with parking sensors or cameras | Replacement bumpers or trim | Sensor positions, camera provisions, wiring and operation of affected systems |
| Vehicle with an uncertain specification | Complete Maybach-style conversion | Exact model, production details, photographs, VIN-based specification check and complete parts list |
This table is a planning guide, not a universal compatibility list. Exact fitment depends on the vehicle, its existing components and the specific conversion kit. Ask the supplier to confirm the proposed parts against your car before placing an order.
Provide the exact model, production details where available, and clear photographs of the front, rear and existing lights. If the original specification is unclear, the VIN may help identify the factory configuration. Share it privately rather than publishing it online.
What to Check and Why
Vehicle Identification
Confirm the exact model and production details. Registration year alone may not identify the components currently fitted to the vehicle.
Bodywork and Mounting
Compare bumper profiles, grille attachment points, brackets and surrounding trim. Similar-looking parts may have different mounting arrangements.
Lighting and Wiring
Identify the existing lamps and proposed replacements. Confirm connector compatibility, supported functions and any required adapters or coding before installation.
Vehicle Equipment
Check parking sensors, cameras and other relevant systems. Confirm that the replacement parts accommodate the equipment and that its functions can be retained.
For a fitment assessment, send clear front, rear and side photographs, close-ups of the existing lights and details of any previous exterior modifications. Photographs help identify potential issues, but they cannot replace a physical test-fit.
Test-Fit Your Parts Before Painting
Before painting or permanently modifying any parts, check the delivered components against the vehicle and the agreed parts list. A test-fit helps identify incorrect parts, mounting issues and clearance problems while they can still be addressed.
1. Inspect the Delivery
Compare every component with the order confirmation and parts list. Check for transport damage, cracks, distorted edges, missing brackets and incorrect parts. Photograph any damage before installation.
2. Check Mounting Points
Compare mounting tabs, brackets, clips and attachment points with the vehicle and the supplied fitting information. Similar bumper shapes do not guarantee identical mounting arrangements.
3. Test-Fit the Panels
Check the fit of the bumpers, grille, headlights, trim and other supplied exterior components as applicable. Inspect panel gaps, transitions and clearances around adjacent bodywork before approving the fit.
4. Check Sensors and Clearances
Confirm that sensor openings, camera provisions, reflectors and other required features are correctly positioned. Check for interference with lights, trim and neighbouring components.
5. Resolve Fitment Issues
If a component does not align correctly, stop and compare it with the agreed specification. Photograph the issue and contact the supplier before cutting, drilling or permanently modifying the part.
6. Approve the Parts for Painting
Proceed only after the workshop has confirmed that the components fit correctly, can be mounted securely and provide the necessary clearances. Complete preparation and painting after the fitment has been accepted.
Confirm that the panels align correctly, mounting points are suitable and all required clearances are maintained. Resolve outstanding fitment issues with the supplier or workshop before authorising paintwork or permanent modifications.
W222 Lighting Retrofit Electrical Checklist
Replacing headlights or taillights may involve more than fitting a new lamp into the bodywork. Compare the existing equipment with the proposed replacement and establish whether additional components, configuration or specialist electrical work will be needed.
| Check | What to Confirm | Why It Matters |
|---|---|---|
| Existing lamp version | Identify the current lamps and the exact replacement version. | Similar-looking lamps are not necessarily interchangeable. |
| Connectors and wiring | Verify connector types, pin assignments and whether adapters or additional wiring are required. | Matching connectors do not guarantee electrical compatibility. |
| Lighting functions | Check all applicable beam, indicator, position and brake-light functions. | All required functions must operate correctly after installation. |
| Modules and coding | Confirm whether control modules, configuration changes, coding or diagnostic work are required. | Requirements depend on the vehicle and replacement parts. |
| Fault messages | Record existing warnings and check for new faults after installation. | A lamp may illuminate while a fault remains. |
| Headlight alignment | Check and adjust the headlight beam after installation where required. | Incorrect alignment can impair visibility or dazzle other road users. |
| Road-use approval | Verify applicable lighting approvals and local requirements. | Technical compatibility alone does not establish road legality. |
Some replacements work without additional coding, while others need adapters, wiring changes, configuration or diagnostic work. Confirm the requirements for the exact vehicle and lamps instead of assuming that coding is always required or never required.
Before the Workshop Starts
Record the Existing Setup
Photograph the existing headlights and taillights, their labels where accessible and relevant connector details. Record existing warning messages before dismantling the vehicle.
Confirm Installation Requirements
Ask which adapters, modules or additional components are included and which must be purchased separately. Have the workshop review the information before fitting begins.
Test the Finished Installation
Check all applicable lighting functions, warning messages and headlight alignment. Verify affected sensors and cameras, and arrange any required calibration or inspection before road use.
For manufacturer-specific workshop information, repair documentation and available technical services, visit Mercedes-Benz B2B Connect. Access to specific information and services may require registration or additional permissions. Electrical changes and diagnostics should be handled by a suitably qualified technician.
What Affects the Total Conversion Cost?
The total cost depends on the kit contents, shipping, vehicle configuration and installation work. Compare the complete project cost rather than the kit price alone.
Conversion Kit
Confirm which bumpers, grille, lights, trim, brackets and adapters are included and which items cost extra.
Shipping and Import
Check delivery charges, destination fees and applicable import duties or taxes. Confirm which costs are included in the quotation and which are payable separately.
Preparation and Painting
Ask the body shop to estimate preparation, test-fitting, surface correction and colour matching. The final cost depends on the condition of the parts and the work required.
Installation Labour
Request an estimate based on the actual vehicle and kit. Previous modifications, missing hardware or unexpected fitment issues can increase the work involved.
Electrical Work
Allow for any required adapters, wiring, coding, diagnostics or calibration identified during the compatibility check.
Inspection and Compliance
Check whether local rules require additional documentation, inspection or approval for the finished vehicle.
Ask for separate costs for parts, shipping, painting, installation and any additional electrical work. Check the exclusions as carefully as the quoted total.
A written estimate based on your vehicle and the agreed parts list is more useful than a general kit price that leaves important work unspecified.
From Assembly to Final Inspection
Once the supplied components have passed the fitment check, the workshop can proceed with the agreed installation. The exact work depends on the kit, the vehicle's existing equipment and any additional requirements identified before assembly.
1. Prepare the Vehicle
Protect the surrounding bodywork and remove the necessary components according to the applicable workshop procedures. Keep reusable fasteners and trim organised, and replace damaged hardware where required.
2. Install the Body Components
Fit the approved bumpers, grille and exterior trim using the appropriate mounting points and hardware. Follow the component instructions and avoid forcing parts into position or making unapproved modifications.
3. Complete the Lighting Work
Install compatible headlights and taillights where included in the package. Confirm the required connectors, adapters and electrical configuration, and have any necessary wiring or diagnostic work completed by a qualified technician.
4. Complete Assembly and Painting
Carry out the agreed preparation and painting work at the appropriate stage of the installation. Refit the relevant trim, sensors and other equipment, ensuring that components are secured correctly and required clearances are maintained.
5. Check Functions and Alignment
Inspect panel alignment and mounting security. Test the applicable lighting functions, check for warning messages and verify affected sensors and cameras. Arrange any required coding, calibration or headlight adjustment.
Confirm that the installed components are securely mounted, the bodywork is correctly aligned and all affected equipment operates as intended. Investigate unresolved faults or warning messages, and verify any applicable inspection and road-use requirements before returning the vehicle to normal use.
W222 Maybach Conversion FAQ
Can I order a kit using only the registration year?
No. Provide the exact model and production details where available, together with photographs of the existing bodywork and lights. Ask the supplier to confirm compatibility with your particular vehicle.
Will a pre-facelift kit fit a facelift W222?
Do not assume that it will. Body parts, lighting and mounting arrangements must be checked against the vehicle and the specific kit before ordering.
Are headlights and taillights included in every kit?
No. Package contents vary. Request a written parts list and confirm whether lights, brackets, trim and adapters are included or sold separately.
Will the original sensors and cameras still work?
That depends on the replacement parts and vehicle configuration. Check mounting provisions and compatibility, then verify the affected systems after installation.
Will replacement lights require coding?
Not necessarily. Requirements depend on the existing equipment and replacement lamps. Confirm any adapters, wiring, configuration or diagnostic work before ordering.
Can I drive the car on public roads after the conversion?
That depends on the components installed and the regulations where the vehicle is used. Check applicable lighting and modification requirements and arrange any required inspection before road use.
Prepare Your W222 Fitment Request
You do not need to know every technical detail before making an enquiry. The information below helps us identify the right parts and establish what needs to be checked before ordering.
Vehicle Details
Exact model, production date if available, body configuration and existing facelift or pre-facelift setup.
Vehicle Photographs
Clear front, rear and side views, plus close-ups of the current headlights, taillights, grille and bumpers.
Existing Equipment
Relevant lighting versions, parking sensors, cameras and any previous exterior modifications.
Requested Components
Specify whether you need a front conversion, rear components, lighting or a complete exterior package.
Delivery Destination
Country and postcode or delivery area so shipping options and applicable charges can be assessed.
VIN, If Needed
If the original specification is unclear, share the VIN privately with the supplier for a vehicle specification check.
Once the vehicle details and requested parts are clear, the next step is to confirm the package contents, check compatibility and identify any additional components or installation work that may be required.
Planning a W222 Maybach Conversion?
Tell us which Mercedes-Benz S-Class W222 you drive, which components you need and where they should be delivered. We can help clarify the available package options, included parts and fitment requirements before you order.